Please welcome Aimee Fagan! Aimee’s work on the Montessori Works Blog has been an inspiration to me for a long time. Aimee is a trained Montessori teacher and she has some wonderful resources for the practical life area of the classroom. She also writes about her experiences raising her children in a Montessori home. Today she has some ideas to help you incorporate a practical life activity to get ready for the gift giving season! You can get her full sewing curriculum on Amazon and take her online short course here.
-Seemi
Get Aimee’s book, “Sewing in the Montessori Classroom” on Amazon

By Aimee Fagan
Handmade gifts are the best! The only thing that makes them better, is when they are made by children.
I strongly believe in the benefit of sewing with children. In my classroom, I have a sewing sequence that we follow, which not only develops sewing skills, but more importantly independence, concentration, coordination, and a sense of order.
Here are two super simple sewing projects that can be used for gifts and easily incorporated into the home or classroom. Now, if you are jumping into these with a relatively new sewer, you will need to be available to help, and guide, especially when it comes to threading the needle and tying the knots. But personally, I love the look of “child made” and I try to make sure that my sewing help is minimal (like making sure that the thread doesn’t completely tangle!)
To get started
you will need:
Needles — for early sewers I suggest blunt tapestry needles, then I move on to the sharper needles that still have a large eye.
Needle threaders – if you plan on incorporating sewing into your class and home, you must invest in a few of these!
Embroidery floss – We tie the loose ends together so there is no chance of the needle becoming unthreaded.
Scissors
Pincushion
All of the above in a cute little basket would make an adorable Holiday gift for a child interested in sewing!
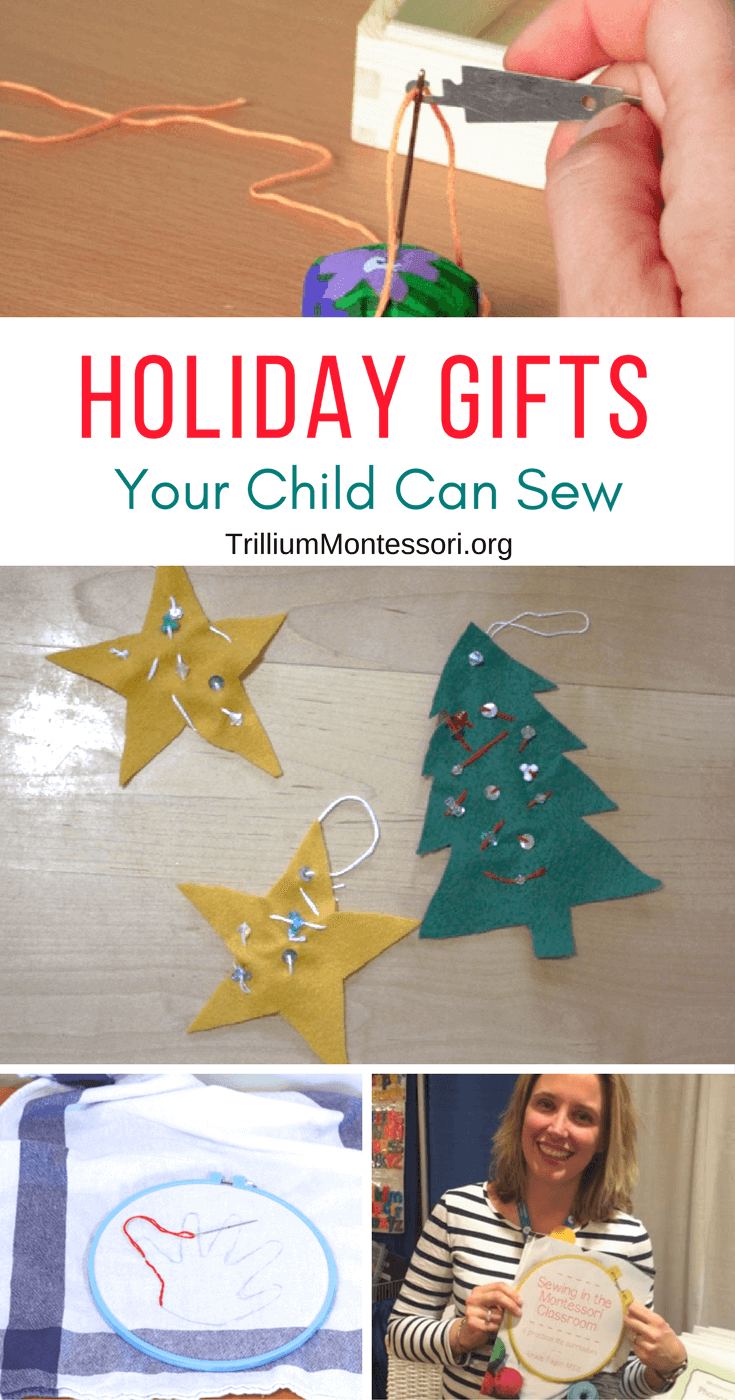
A Set of Ornaments

The great thing about these is that they can be done by a child at almost any sewing stage. Obviously the youngest will need support, but it still results in a lovely homemade gift!
Materials:
- Stars (or other holiday shape) cut from felt, I like to have the child make 2-3 per gift.
- Beads and sequins with holes large enough for your needle (the sparklier the better)
- Ribbon
- Needle, embroidery floss, scissors, pincushion
Process:
- Start by helping the child get the needle threaded and the knot tied. If you are interested in lessons to help the child do this independently, see below.
- Have the child come through the felt and then pick a bead to put on the needle. Have them sew back down through the felt.
Here is where your involvement comes into play with the younger sewer. My main goal is to help them not pull the thread so tightly that the felt shape becomes distorted – but otherwise I am very hands off, and allow the child to follow their ideas. The great aspect of this project is that the embroidery floss becomes part of the decoration as well, if you cut out Christmas trees, and used red floss, it’s now tinsel! I like the look of the white floss on the star. - Continue to add beads until the ornament has been decorated to the child’s satisfaction, help the child tie a knot to finish.
- For adult or older independent sewer, cut a length of ribbon and attach it (either with a thread or a glue gun).
- Repeat for as many as needed!
Embroidered Dishcloth

This is a gift we make every Mother’s Day with out kindergarten students. It is for the more independent sewer, but can still be adapted for the beginner.
Materials:
- Dish Towels, prewashed, dried, and lightly ironed
- Embroidery hoops
- Needle, embroidery floss, scissors, pincushion
Process:
- Trace the child’s hand onto the lower middle part of the towel.
- Attach the embroidery hoop.
- Have the child backstitch (or just stitch for the younger sewer) along the pencil line.
- When complete, we write the child’s name and the year on the edge of the towel.
Threading a Needle
This is how I teach a child to thread a needle. It is a long process, and it can take a child months to become an independent needle threader! Often the child needs help guiding their hands to get the needle threader through the eye of the needle. We usually incorporate this lesson into any other sewing work that we have out, rather than have a “needle threading” work on the shelf.

Materials:
- A pincushion or cork
- A needle with a large eye
- A needle threader
- A precut length of thread
- A magnet (optional, to hold the needle and needle threader)
- A small dish for the magnet
- A tray to hold the materials
Presentation:
- Invite the child to the lesson, take the tray to the table.
- Holding the needle, point out the eye and name it. I say, “This is the eye. It’s not like our eye, but it’s the same word.”
- Place the needle in the pincushion, showing that the eye is still upward.
- Take the needle threader in the dominant hand and slide the large hook through the eye — do not let go of the needle threader.
- Pick up the thread with the subdominant hand, and place it over the hook with about a two-inch tail at one end.
- Hold the needle at the base with the subdominant hand. Using the dominant hand that is still holding the needle threader, pull the hook of the needle threader back through the eye and until one end of the thread has come through the eye.
- Point out that there is an end of the thread on each side of the eye.
- Remove the thread, invite the child to try, helping as needed.
Tying a Knot to Finish
We have two ways to tie a knot, and both have their pros and cons. Practice both and see which works best for you. We present both: some children prefer one way and others another – and still others come up with a different way!
Similar to threading a needle, this is not a lesson that we always put out as an individual work. Some years children enjoy practicing, other times the material is hardly touched. If we don’t have it out as a lesson, we present this same lesson as part of the initial sewing lessons.
Again, this is a lesson that I usually do in an interactive fashion, rather than the traditional Montessori way of the teacher presenting the whole lesson, and then inviting the child. Since it is so complex, I find that children tend to master it faster if we do it together, and I use my hands to guide them — hand over hand.
Materials:
- A pincushion or cork
- A needle with a large eye
- A needle threader
- Embroidery floss wrapped on a plastic bobbin
- A pair of scissors
- A magnet (optional, to hold the needle and needle threader)
- A small dish for the magnet
- A tray to hold the materials
Presentation I:
- Invite the child to the lesson, take the materials to the table.
- Measure the thread and cut. We use the measurement on the length of the table or the length of the child’s arm — it ends up begin about 20 inches. Based on your environment, you can adjust your method of measuring the thread.
- Thread the needle as described in the previous lesson.
- Remove the needle from the pincushion.
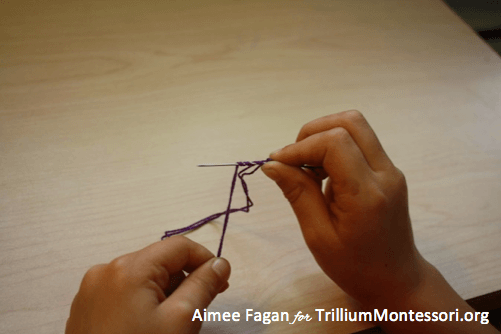
- Bring the ends of the thread together so that they are even and the needle is in the middle of the thread.

- In the dominant hand, pinch the ends of the thread.

- Add the eye of the needle to the pinched ends in the dominate hand.

- With the subdominant hand, grasp the floss in the middle.

- With the subdominant hand, wrap the floss around the needle three times.

- Now hold the tip of the needle with the subdominant hand.
- Slide the dominant hand’s grip up to include the thread that was wrapped around the needle.
- Holding the tip of the needle with the subdominant hand, slide the dominant hand (which is holding the wrapped thread, the eye of the needle and the end of the thread) off the end of the needle and to the end of the thread.
- Cut the knot and return the materials to the tray, or start sewing.
Here is the whole process in motion:
Presentation II:
- Invite the child to the lesson, take the materials to the table.
- Measure the thread and cut. We use the measurement on the length of the table or the length of the child’s arm — it ends up begin about 20 inches. Based on your environment, you can adjust your method of measuring the thread.
- Thread the needle as described in the previous lesson.
- Remove the needle from the pincushion.
- Bring the ends of the thread together so that they are even and the needle is in the middle of the thread.

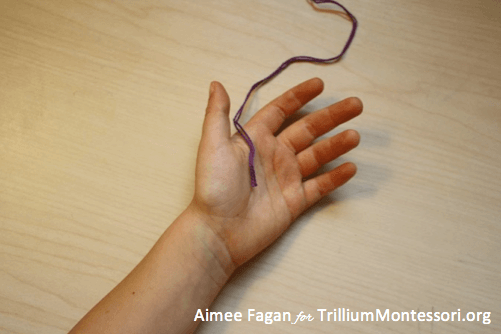
- Lay the end of the thread in the palm of the subdominant hand.

- Pinch down with the fingers to hold the thread, leaving the thumb sticking up.

- Wrap the thread around the thumb.
- Use the needle to sew under the thread.

- Carefully remove the knot from the thumb.
- Gently coax the loop down to the end of the thread
- Pull the knot tight.
This is the easiest method of tying a knot, but unfortunately the knot isn’t very large, and often the child tightens it in the middle of the thread, so they can’t sew for very long without rethreading.
I hope that these ideas inspire you to make some wonderful gifts this holiday season.
About Aimee Fagan
Aimee Fagan is the author of “Sewing in the Montessori Classroom: A Practical Life Curriculum.” and has served as the Director of Accreditation at MACTE.
Aimee is an AMS trained Primary Montessori guide and has her M.Ed. in Curriculum & Instruction from the University of Virginia. Aimee has worked in Montessori Early Childhood classrooms for over 10 years.
You can take her online workshop about sewing in the classroom here.


